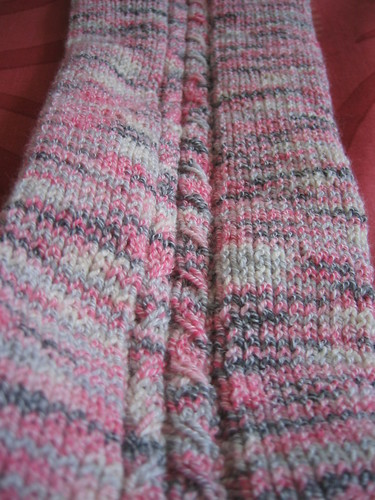
I can finally say I've finished a pair of socks.
I feel confident that my next pair will be more beautiful, though these are certainly functional!!
These languished for the entire summer after I made good progress during my one giant lecture last academic year. I came back to them recently thinking that I would just frog the first sock back to the length of the second sock, since it was 75% finished, but when I looked more closely at them again and tried on the first one I thought, nah, I'll just go for it.
I'm not really into the pink any more and it looks too busy for my liking, but this yarn is nice and stretchy - Patons - and I bought it on a two for one sale, I think, so I wanted to use one ball per sock, which is pretty much what I did. Size 0 needles. I used Wendy's toe-up sock pattern, and changed it just a little to do a three stitch wide faux cable at the back, mirrored ones, so it looks a bit like a seam which kept these slightly more interesting.
So for the center back 12 sts:
p2, k3, p2, k3, p2 for three rows
p2, sl1, k2, p2, k2, sl 1 for two rows
p2, holding slipped stitch to the front, k2, k slipped st, p2, work over next 2 k sts to k slipped stitch, then without dropping it (because 2 other k sts are in the way) k the 2 stitches coming up next, and drop that slipped st off when you come to it, having already knit it, p2.
I'm sure there's a better way to explain that, but when you're working it it makes sense. Repeat these six rows until the sock is as tall as you like and then do a couple of inches of k1p1 rib.
My next pair will be shorter and have a more interesting pattern. And also I learned that it's a pretty good idea to increase a few sts as you progress up a calf, since the knitting needs to cover more ground. Oops. Hindsight is 20/20, right?


love love love the faux cable "seam" up the back!
ReplyDeleteI think they are so cute!
ReplyDeleteVery pretty! And the yarn really does make the cables pop nicely. Good job!
ReplyDelete